运行手册
- Tier: Free, Premium, Ultimate
- Offering: GitLab.com, GitLab Self-Managed, GitLab Dedicated
运行手册是一系列文档化的程序,用于说明如何执行特定流程,无论是启动、停止、调试还是排查特定系统的问题。
使用 Jupyter Notebooks 和 Rubix 库,用户可以开始编写自己的可执行运行手册。
传统上,运行手册根据条件或系统的不同,以决策树或详细的分步指南的形式呈现。
现代实现引入了"可执行运行手册"的概念,在明确定义的流程之外,操作员还可以针对特定环境执行预写的代码块或数据库查询。
可执行运行手册
GitLab Kubernetes 集成提供的 JupyterHub 应用现在包含了 Nurtch 的 Rubix 库,为创建 DevOps 运行手册提供了简单的方法。提供了一个示例运行手册,展示常见操作。虽然 Rubix 使得创建常见的 Kubernetes 和 AWS 工作流变得简单,但您也可以在没有 Rubix 的情况下手动创建它们。
观看此 视频 了解在 GitLab 中如何实现此功能!
要求
要创建可执行运行手册,您需要:
- Kubernetes - 需要一个 Kubernetes 集群来部署其余的应用程序。最简单的入门方法是使用 GitLab Kubernetes 代理 连接集群。
- Ingress - Ingress 可以提供负载均衡、SSL 终止和基于名称的虚拟主机。它充当您应用程序的 Web 代理。
- JupyterHub - JupyterHub 是一个多用户服务,用于管理团队中的笔记本。Jupyter Notebooks 提供了一个基于 Web 的交互式编程环境,用于数据分析、可视化和机器学习。
Nurtch
Nurtch 是 Rubix 库 的开发公司。Rubix 是一个开源 Python 库,使得在 Jupyter Notebooks 中执行常见 DevOps 任务变得简单。诸如绘制 Cloudwatch 指标和部署您的 ECS/Kubernetes 应用等任务被简化为几行代码。更多信息请参见 Nurtch 文档。
使用 GitLab 配置可执行运行手册
按照此分步指南,使用前面概述的组件和预加载的演示运行手册在 GitLab 中配置可执行运行手册。
-
创建一个 JupyterHub 的 OAuth 应用程序。
-
当 使用 Helm 安装 JupyterHub 时,使用以下值:
#----------------------------------------------------------------------------- # The hub.config.GitLabOAuthenticator section must be customized! #----------------------------------------------------------------------------- hub: config: GitLabOAuthenticator: # Limit access to members of specific projects or groups or to specific users: # allowedGitlabGroups: [ "my-group-1", "my-group-2" ] # allowedProjectIds: [ 12345, 6789 ] # allowed_users: ["user-1", "user-2"] client_id: <Your OAuth Application ID> client_secret: <Your OAuth Application ID> enable_auth_state: true gitlab_url: https://gitlab.example.com oauth_callback_url: http://<Jupyter Hostname>/hub/oauth_callback scope: - read_user - read_api - openid - profile - email JupyterHub: authenticator_class: gitlab extraConfig: gitlab-config: | c.KubeSpawner.cmd = ['jupyter-labhub'] c.GitLabOAuthenticator.scope = ['api read_repository write_repository'] async def add_auth_env(spawner): ''' We set user's id, login and access token on single user image to enable repository integration for JupyterHub. See: https://gitlab.com/gitlab-org/gitlab-foss/-/issues/47138#note_154294790 ''' auth_state = await spawner.user.get_auth_state() if not auth_state: spawner.log.warning("No auth state for %s", spawner.user) return spawner.environment['GITLAB_ACCESS_TOKEN'] = auth_state['access_token'] spawner.environment['GITLAB_USER_EMAIL'] = auth_state['gitlab_user']['email'] spawner.environment['GITLAB_USER_ID'] = str(auth_state['gitlab_user']['id']) spawner.environment['GITLAB_USER_LOGIN'] = auth_state['gitlab_user']['username'] spawner.environment['GITLAB_USER_NAME'] = auth_state['gitlab_user']['name'] c.KubeSpawner.pre_spawn_hook = add_auth_env singleuser: defaultUrl: "/lab" image: name: registry.gitlab.com/gitlab-org/jupyterhub-user-image tag: latest lifecycleHooks: postStart: exec: command: - "sh" - "-c" - > git clone https://gitlab.com/gitlab-org/nurtch-demo.git DevOps-Runbook-Demo || true; echo "https://oauth2:${GITLAB_ACCESS_TOKEN}@${GITLAB_HOST}" > ~/.git-credentials; git config --global credential.helper store; git config --global user.email "${GITLAB_USER_EMAIL}"; git config --global user.name "${GITLAB_USER_NAME}"; jupyter serverextension enable --py jupyterlab_git proxy: service: type: ClusterIP -
JupyterHub 安装成功后,在浏览器中打开 Jupyter 主机名。选择 使用 GitLab 登录 按钮登录 JupyterHub 并启动服务器。OAuth2 为 GitLab 实例的任何用户启用身份验证。此按钮会将您重定向到 GitLab 上的一个页面,请求授权 JupyterHub 使用您的 GitLab 账户。

-
选择 授权,GitLab 会将您重定向到 JupyterHub 应用程序。
-
选择 启动我的服务器,几秒钟后即可启动服务器。
-
要配置运行手册对您的 GitLab 项目的访问权限,您必须在演示运行手册的 设置 部分输入您的 GitLab 访问令牌 和项目 ID:
-
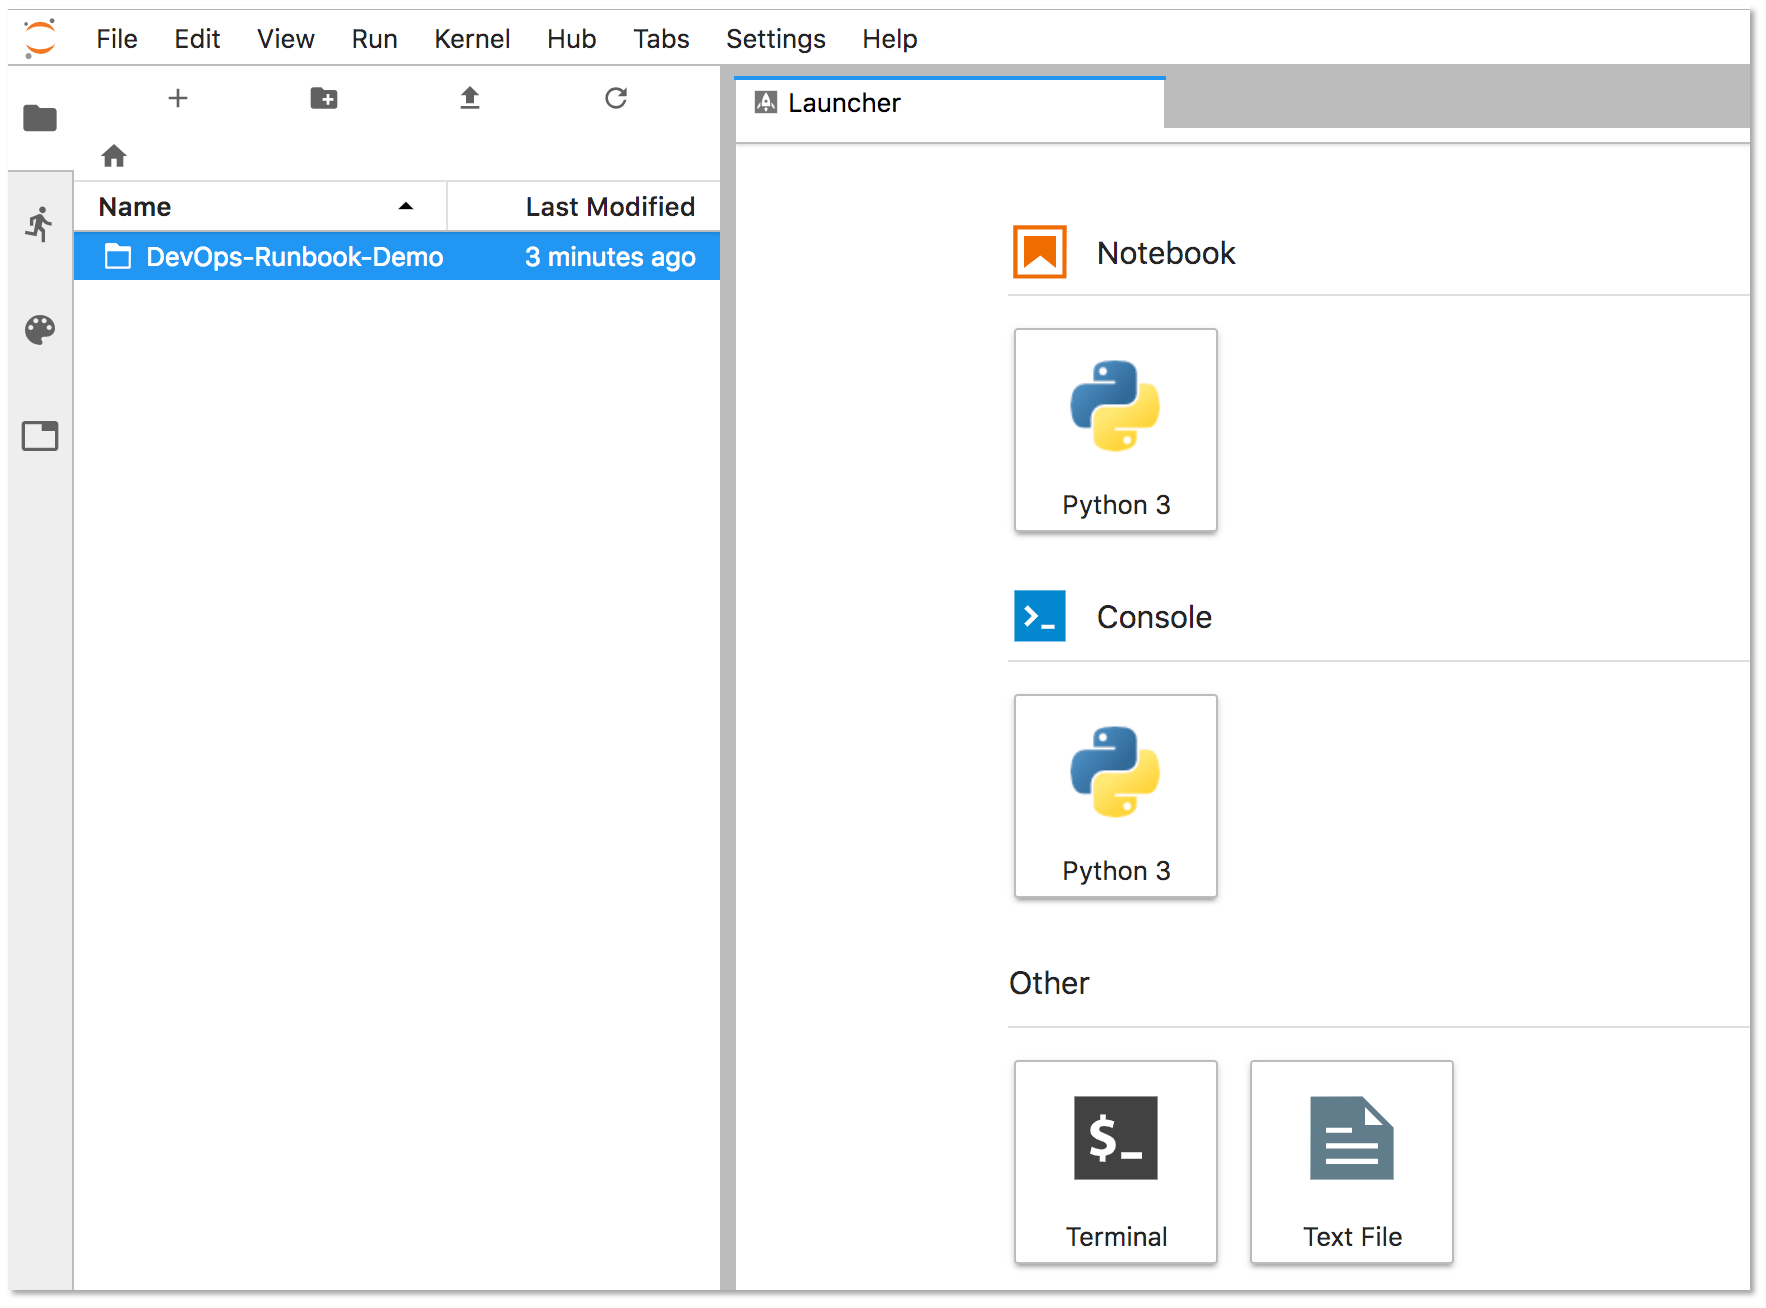
选择左侧面板中的 DevOps-Runbook-Demo 文件夹。
-
选择
Nurtch-DevOps-Demo.ipynb运行手册。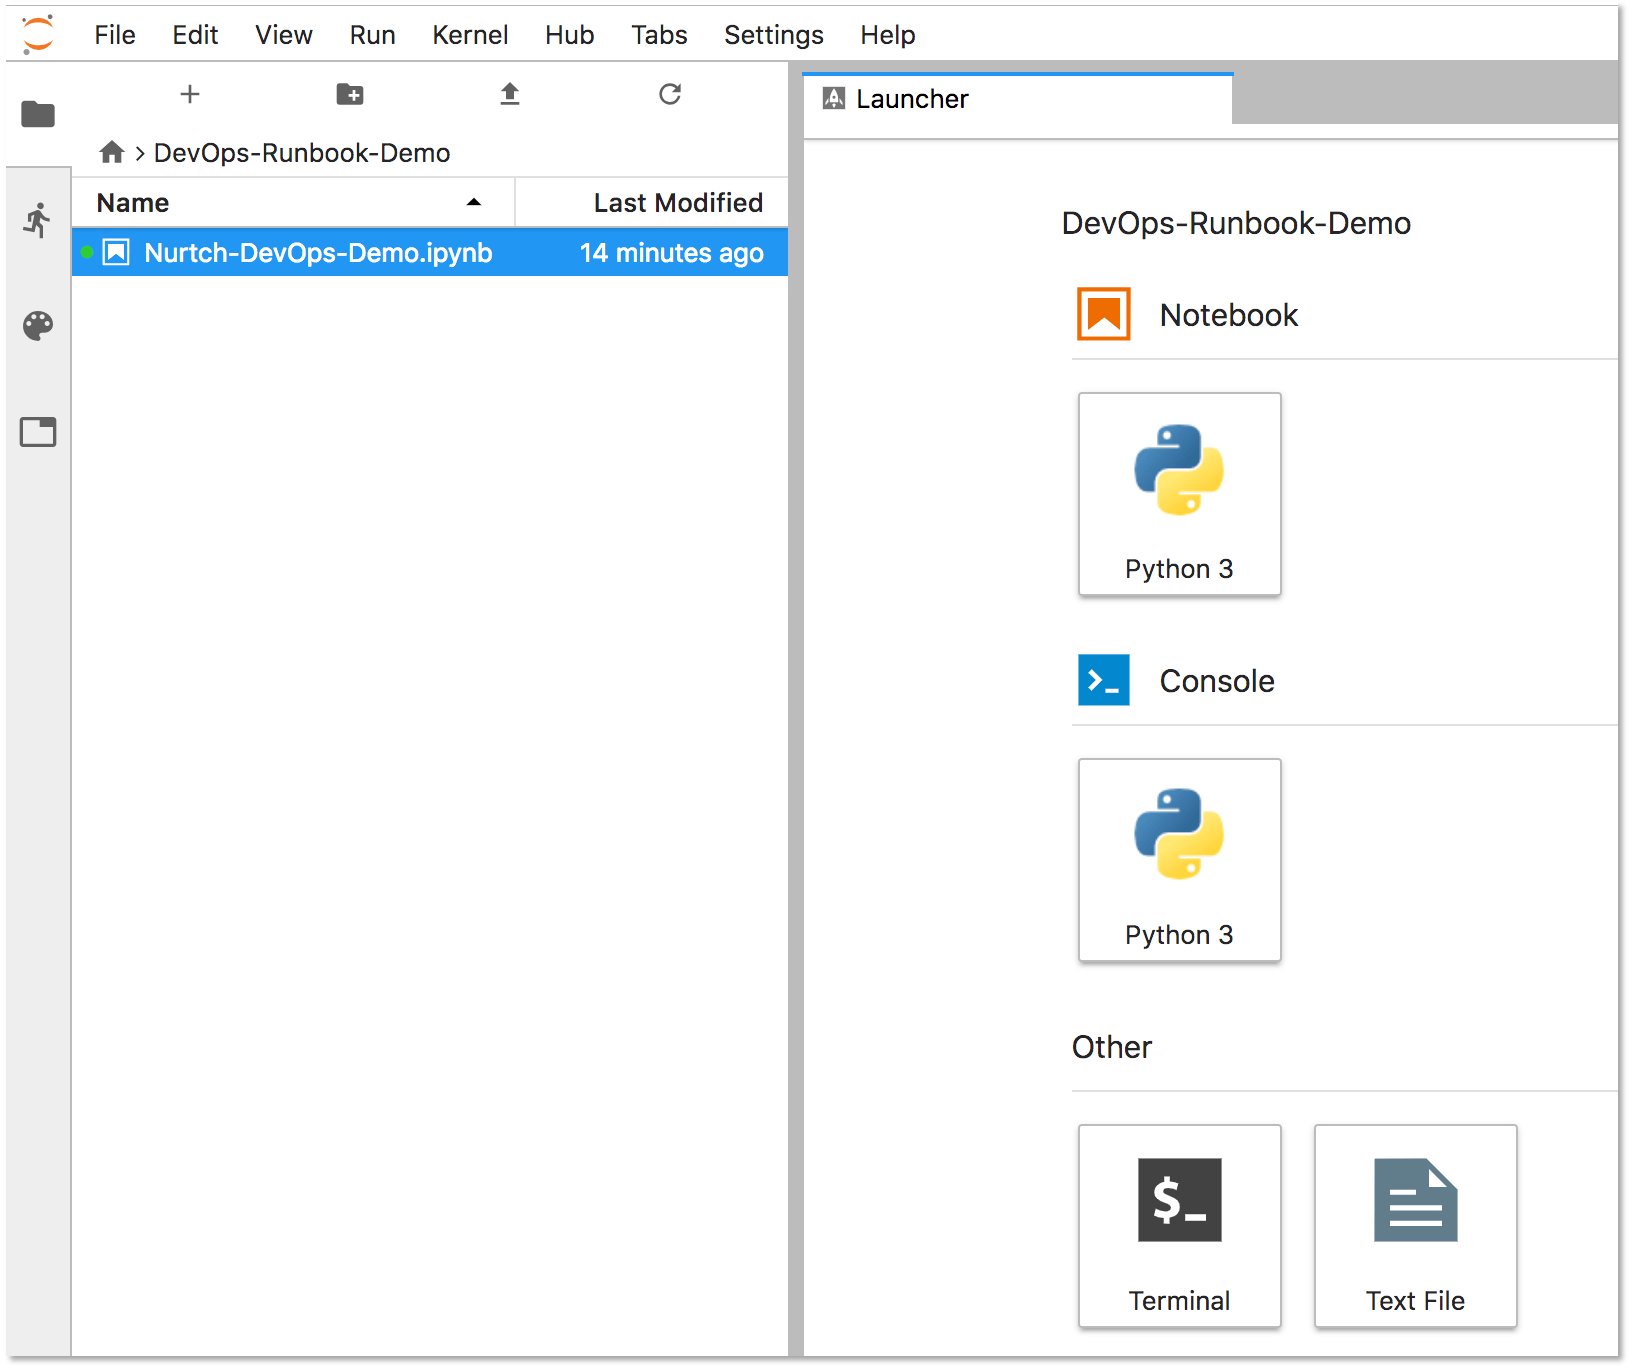
Jupyter 在屏幕右侧显示运行手册的内容。设置 部分会显示您的
PRIVATE_TOKEN和PROJECT_ID。输入这些值,保持单引号如下:PRIVATE_TOKEN = '<your_access_token>' PROJECT_ID = '1234567' -
更新本节最后一行的
VARIABLE_NAME以匹配您用于访问令牌的变量名称。在此示例中,我们的变量名称是PRIVATE_TOKEN。VARIABLE_VALUE = project.variables.get('PRIVATE_TOKEN').value
-
-
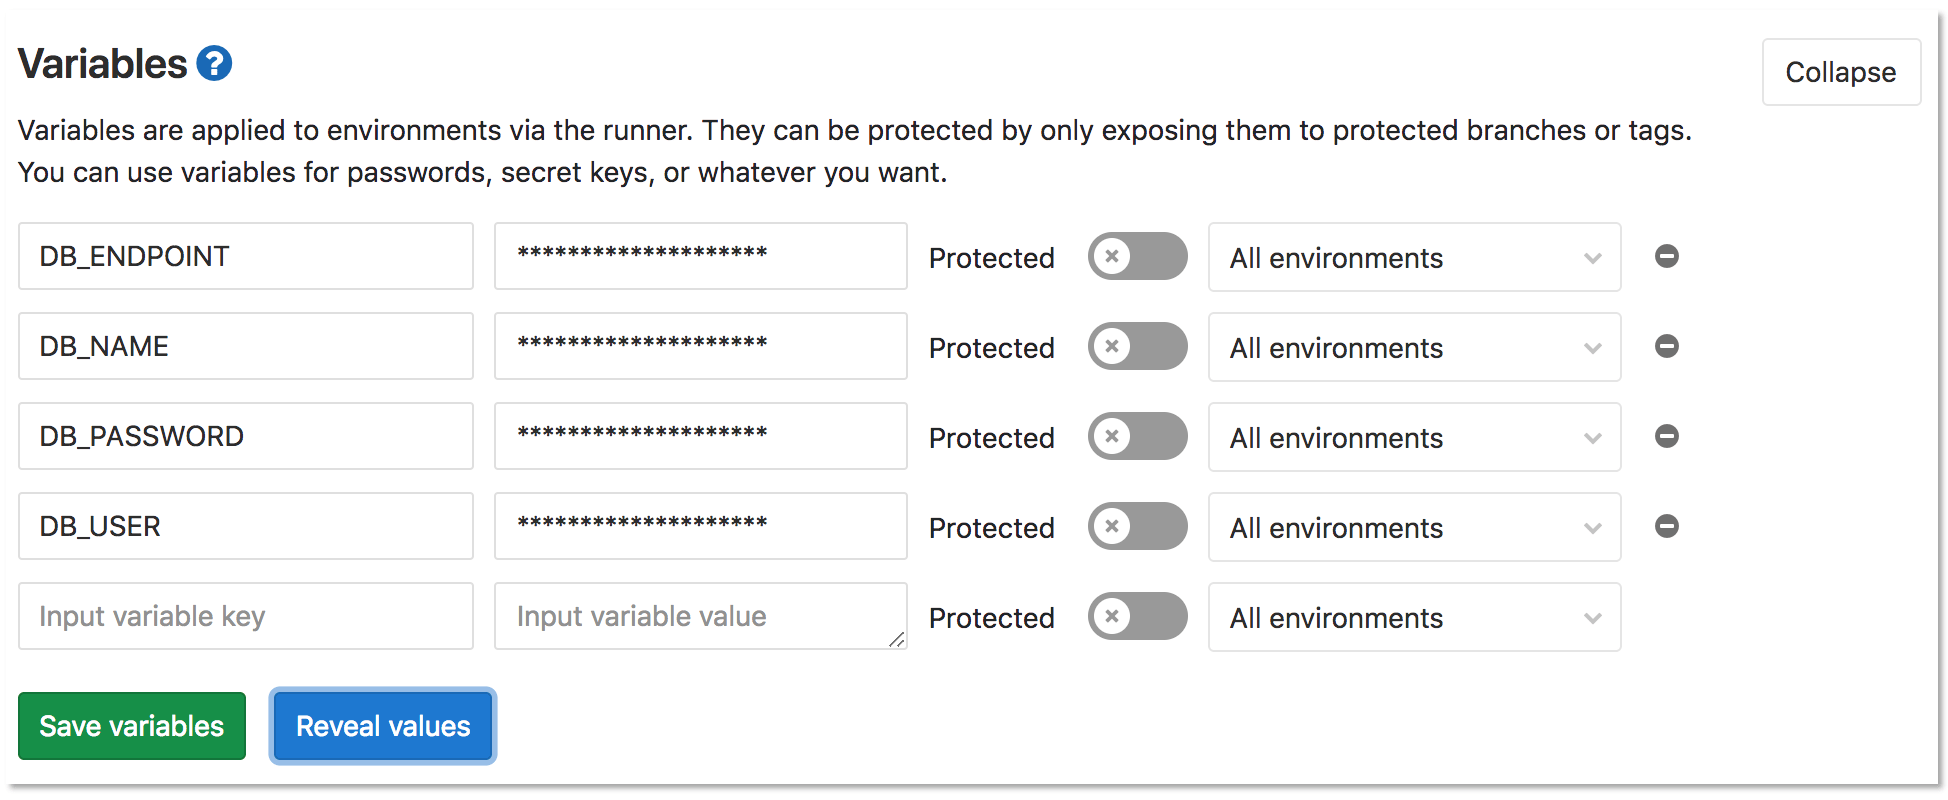
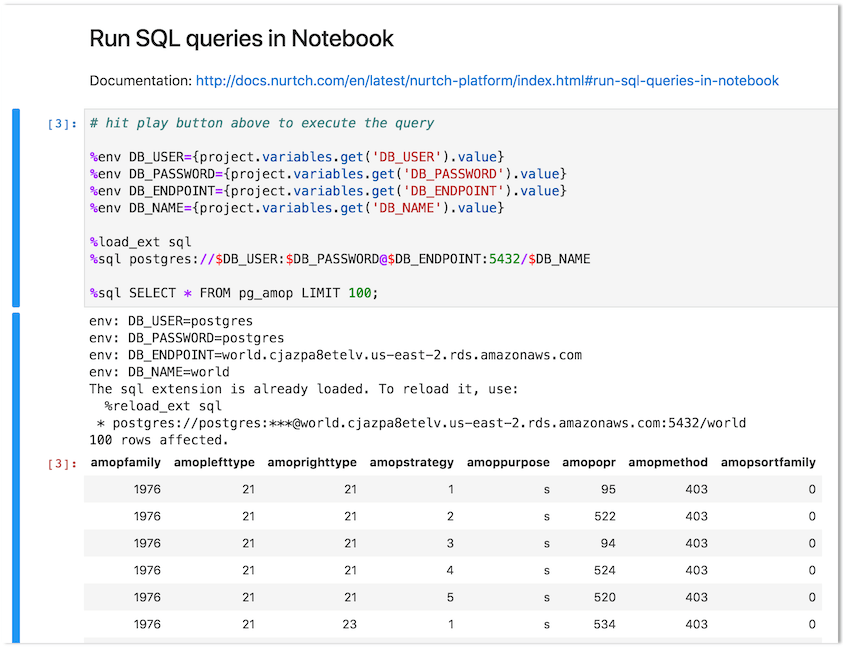
要配置运行手册的操作,请创建和配置变量。在此示例中,我们使用示例运行手册中的 在笔记本中运行 SQL 查询 部分来查询 PostgreSQL 数据库。以下代码块的前四行定义了此查询功能所需的变量:
%env DB_USER={project.variables.get('DB_USER').value} %env DB_PASSWORD={project.variables.get('DB_PASSWORD').value} %env DB_ENDPOINT={project.variables.get('DB_ENDPOINT').value} %env DB_NAME={project.variables.get('DB_NAME').value}-
选择 设置 > CI/CD > 变量 在您的项目中创建变量。
-
选择 保存变量。
-
在 Jupyter 中,选择 在笔记本中运行 SQL 查询 标题,然后选择 运行。结果会以内联方式显示如下:
-
您可以尝试其他操作,例如运行 shell 脚本或与 Kubernetes 集群交互。更多信息请访问 Nurtch 文档。